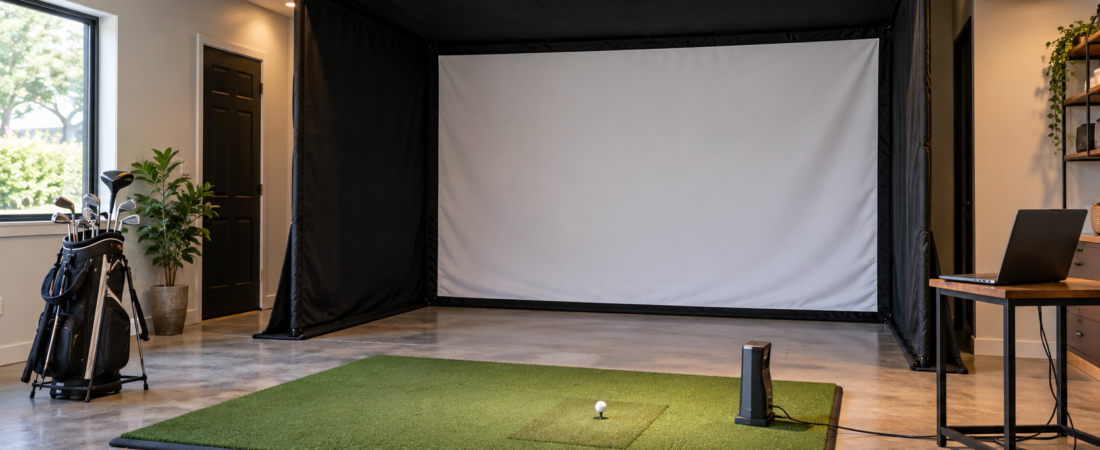
A home golf simulator requires several components working together, but not every setup needs the most expensive equipment or every available accessory. At a minimum, you will need a way to track your shots, a safe place to hit the ball, and enough room to swing comfortably. From there, components such as an impact screen, projector, enclosure, hitting mat, and wall protection can make the experience safer and more realistic. Understanding which pieces are essential—and which are optional—can help you plan a simulator that fits your room, budget, and expectations.
Start With the Room
Before choosing equipment, confirm that the room can accommodate a comfortable golf swing and the components you plan to install. Ceiling height is often the first concern, but room width and depth are just as important. You will need enough space for the golfer, the hitting area, the impact screen or net, and any projector or tracking equipment.
Available space may also determine which launch monitor, enclosure, or screen will work. Measuring first can prevent you from buying equipment that cannot be positioned correctly or used safely in the room.
Launch Monitor
A launch monitor is equipment that measures what happens when you strike the ball. Depending on the model, it may track ball speed, launch angle, carry distance, spin, club path, and face angle. It then uses that information to calculate or display the shot’s flight.
Some launch monitors sit beside or behind the golfer, while others are mounted overhead. The right design depends on the room size, whether both right- and left-handed golfers will use the simulator, and how permanent you want the installation to be. Before buying, also check whether the required simulation software is included or must be purchased separately.
Simulator Software and a Compatible Device
Simulator software turns the launch monitor’s measurements into a visual golf experience. Depending on the system, it may include practice ranges, skill games, club data, and virtual golf courses. Some launch monitors work with their own software, while others support several third-party programs.
You will also need a compatible computer, tablet, or mobile device to run the software. More detailed graphics and higher resolutions generally require a more capable computer and graphics card. Check the launch monitor and software requirements before purchasing a computer so you don’t pay for more performance than you need—or end up with a device that cannot run the system properly.
Hitting Mat
A hitting mat provides a stable surface for the golfer and protects the floor from repeated club strikes. Although basic mats may suit occasional practice, a better hitting surface can feel more realistic and may reduce strain on the hands, wrists, and elbows.
Consider the mat’s size and thickness, whether it accepts a real tee, and whether the hitting strip can be replaced separately. The golfer should stand at the same height as the ball, so a small hitting strip may need to be combined with stance mats or surrounding turf. The finished hitting area should remain flat and secure during the swing.
Impact Screen or Golf Net
Every indoor simulator needs a safe way to stop the golf ball. A golf net is usually the simpler and less expensive choice. It works well when shot data will be viewed on a television, computer monitor, or tablet rather than projected in front of the golfer.
An impact screen stops the ball and provides a surface for the projected image. This creates a more immersive experience, but the screen must be sized, tensioned, and installed correctly. Screen quality can affect image clarity, noise, durability, and how far the ball rebounds after impact. Leave sufficient space behind the screen so it can absorb the force of the shot without striking the wall behind it.
Projector and Image Source
A projector is necessary if you want to display the golf course directly on an impact screen. The projector must be bright enough for the room and able to produce an image that fits the screen’s dimensions. Consider throw distance, mounting position, resolution, and aspect ratio before purchasing.
Projector placement is especially important. A poorly positioned unit can create shadows or place the projector in the path of the club or golf ball. Ceiling-mounted projectors are common, but floor-mounted models and protective projector enclosures may work better in some rooms. You can use a television or monitor when a projected image isn’t necessary.
Enclosure and Surrounding Protection
An enclosure supports the impact screen and helps contain shots that travel to either side or above the hitting area. It can be a practical choice for a dedicated simulator room, particularly when different golfers or less-experienced players will use the system.
Not every installation requires a complete enclosure, but exposed walls, ceilings, windows, and equipment may still need protection. Side barriers, foam panels, curtains, netting, or felt wall coverings can help control mishits and reduce hard rebounds. The amount of protection needed depends on the room layout and the people who will be using the simulator.
Cables, Power, and Internet Connection
Small technical details are easy to overlook during early planning. Your launch monitor, computer, projector, television, and other components may require several electrical outlets and different types of cables. Planning their locations in advance can reduce visible wiring and help prevent cords from crossing walking or hitting areas.
Some simulator software and launch monitors also require an internet connection for setup, updates, subscriptions, or online play. If the room has a weak wireless signal, you may need to improve the Wi-Fi coverage or provide a wired connection. Confirm cable length and connection type before permanently mounting any equipment.
Useful but Optional Accessories
Once the essential equipment is in place, accessories can make the simulator safer and more convenient. Common additions include a ball tray, club rack, side barriers, ball-return system, projector stand, screen-care products, seating, and storage for shoes or other equipment.
These items can improve the finished room, but you don’t need to buy them all at the beginning. It is often better to use the simulator first and see which additions would solve an actual problem. That approach helps keep the initial cost under control and prevents the room from becoming crowded with accessories you rarely use.
What Is the Minimum Equipment You Need?
For a basic practice setup, you may only need a launch monitor, hitting mat, golf net, and a compatible phone, tablet, or computer. This can provide useful shot information without requiring a projector or permanent construction.
For a more immersive simulator, the typical equipment list includes a launch monitor, simulator software, a capable computer, a hitting mat, an impact screen, a projector, and an enclosure or surrounding protection. You can then add turf, wall padding, ball-return equipment, and other accessories based on the room and budget.
The best starting point is not necessarily the longest equipment list. It is the simplest combination that provides the experience you want while fitting safely within the available space.
Plan the Equipment as One Complete System
A home golf simulator works best when you choose its components as a complete system rather than separate purchases. The launch monitor must have enough room to track shots, the software must run on the selected device, the projector must fit the screen, and the enclosure must fit the room.
Start with accurate room measurements and decide what kind of experience you want to create. Then prioritize essential equipment and add optional features over time. Careful planning at the beginning makes it much easier to build a simulator that is safe, comfortable, and enjoyable to use.