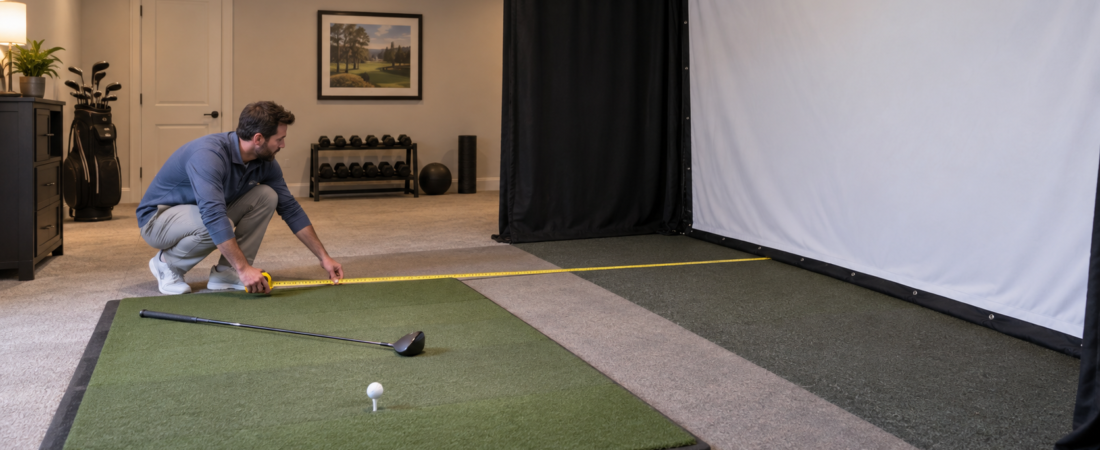
For many home golf simulators, placing the ball approximately 8 to 10 feet from the impact screen provides a practical starting point. This distance usually gives the screen room to absorb the shot while keeping the golfer close enough for an immersive projected image.
That range is not a universal rule. Some simulator systems specify a hitting distance of 10 to 12 feet, while compact installations may place the golfer closer. The screen material, installation method, launch monitor, projector, room dimensions, and the golfer’s ball speed can all affect the final position.
Before installing the hitting mat permanently, check the requirements for every major component and test how the screen responds. The safest and most effective hitting distance is the one that satisfies the equipment specifications while controlling rebound and providing enough room for a comfortable swing.
Start With a Distance of 8 to 10 Feet
A distance of 8 to 10 feet between the ball and impact screen works well for many residential installations. It provides meaningful ball travel, keeps the projected screen within the golfer’s field of view, and usually leaves enough space behind the golfer in a typical simulator room.
Ten feet is often the more comfortable starting point when room depth permits. It gives the golfer more reaction time if a ball rebounds and provides better coverage for higher-angle shots.
Do not position the hitting mat based on this general range alone. The enclosure and launch monitor may have their own requirements, and those specifications should take priority.
Why Standing Too Close Can Be a Problem
Standing too close to an impact screen can increase the chance that a rebounding ball reaches the golfer before they have enough time to react. The amount of bounceback depends on the screen material, screen tension, available space behind the screen, ball speed, and where the ball hits the screen.
The risk increases when the screen is mounted too tightly or doesn’t have enough room to flex. In those situations, even a properly manufactured impact screen may return the ball more forcefully than expected.
Moving the hitting area slightly farther back may improve safety, but distance alone can’t fix an improperly installed screen. Screen installation and hitting distance must be evaluated together.
Is Farther From the Screen Always Better?
More distance can reduce some bounceback concerns, but farther is not automatically better. Moving the golfer back requires more room behind the hitting position and may place the club closer to a wall, doorway, seating area, or other obstruction.
A greater hitting distance also changes the path of high or off-center shots. Side barriers and ceiling protection may need to extend farther into the room to keep those shots contained.
Projector placement can also become more complicated. If the golfer and projector aren’t planned together, the golfer may cast a shadow on the screen or interfere with the projected image.
Leave Space Behind the Impact Screen
The distance between the golfer and the screen is only one part of the calculation. An impact screen must also have enough open space behind it to flex when struck without contacting the wall.
Many installations allow approximately 12 to 16 inches between the screen and the surface behind it, but the required clearance varies by screen and mounting system. Follow the screen manufacturer’s instructions rather than treating a general measurement as universal.
If the screen hits a hard wall on impact, the ball may rebound more forcefully, and the screen may wear out prematurely. Anything stored behind the screen must also remain outside the area the fabric can reach when absorbing a shot.
Screen Tension Affects Bounceback
An impact screen must be tensioned enough to stay reasonably smooth for the projected image, but it should still absorb the ball’s energy. Pulling the screen excessively tight can increase bounceback and place unnecessary stress on the fabric and attachment points.
A screen that is too loose can sag, develop wrinkles, or produce an uneven image. It may also allow the ball to drop unpredictably after impact.
Use the attachment spacing and tension recommended for the particular screen and enclosure. The best installation balances image quality, durability, and safe energy absorption rather than maximizing tightness.
The Launch Monitor May Determine the Hitting Position
Different launch-monitor technologies require different amounts of space around the ball. Camera-based floor units often work within a relatively compact hitting area, while radar-based systems may need more ball flight in front of the golfer and additional room behind the ball.
Overhead launch monitors generally have a defined hitting zone based on their mounting position. Moving the mat forward or backward after installation can place the ball outside that zone and affect shot detection.
Confirm the required distances for the specific launch monitor before mounting the projector, securing the enclosure, or cutting a hitting strip into the floor. The launch monitor’s requirements may ultimately determine how far the golfer stands from the screen.
Plan the Projector and Protective Coverage Together
The golfer’s position affects where you can mount the projector. The projector must fill the screen without sitting in the path of the club or ball, and its placement should minimize shadows cast by the golfer.
The farther the golfer stands from the screen, the farther side barriers and ceiling protection may need to extend into the room. A ball struck at an angle can travel outside the screen area before reaching the front of the enclosure.
Mark the hitting position before choosing the projector location or finalizing the protective coverage. Planning these components together is easier than attempting to correct shadows or exposed surfaces after installation.
Test the Position Before Installing the Mat
Use painter’s tape to mark the proposed screen and ball positions on the floor. Confirm that the golfer has enough room to swing, that the launch monitor can operate from the planned location, and that the projector can produce the required image size.
Once the screen is installed according to its instructions, begin testing with controlled, lower-speed shots. Observe the amount and direction of rebound before progressing to full swings with longer clubs.
If the ball returns too fast, stop and review the screen tension, rear clearance, mounting method, and hitting distance. Do not rely on a single adjustment when several parts of the installation may be contributing to the problem.
The Bottom Line
For many home golf simulators, standing approximately 8 to 10 feet from the impact screen is a sensible starting point. Some systems work best with a greater distance, and the equipment manufacturer’s specifications should always take priority.
The final position must account for screen bounceback, rear clearance, launch-monitor requirements, projector placement, swing space, and the room’s protective coverage.
Measure and mark the complete layout before permanently installing the hitting mat. A carefully tested hitting position will make the simulator safer, more comfortable, and more reliable to use.