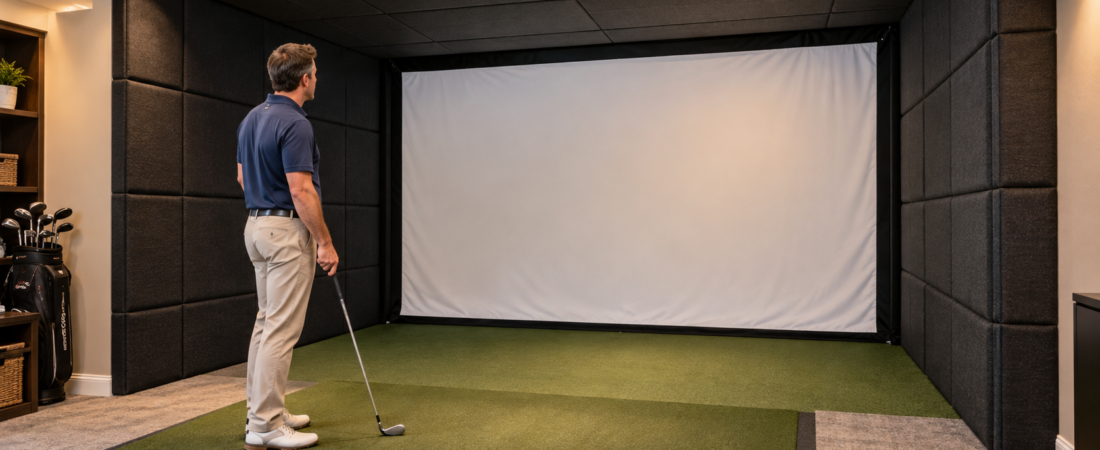
An impact screen protects the main target area of a golf simulator, but it cannot contain every shot by itself. Shanks, hooks, slices, topped shots, and high wedges can reach the walls, ceiling, floor, or exposed structure surrounding the screen. Not that you would ever hit such a shot…but your friend might.
The right protection depends on the room, the hitting position, and the golfers using the simulator. A deep enclosure may contain most misses, while a shallow or open installation may require additional wall padding, curtains, ceiling panels, or felt covering.
Plan protection before permanently installing the hitting mat and equipment. It is easier to cover realistic ball paths during the design stage than to repair damaged surfaces or correct dangerous rebounds later.
Start With the Hitting Position
Mark the spot you propose to strike the ball from. This location determines which parts of the room an errant shot can reach, and moving the hitting position farther from the screen only increases the area you’ll want to protect. Consider where a severe hook, slice, shank, topped ball, or high wedge could travel before reaching the front of the simulator.
Plan around the least accurate golfer who will regularly use the room, not only the best player. A simulator shared with family members or guests generally needs broader protective coverage than one used by a single experienced golfer.
Use the Enclosure as the First Line of Protection
A golf simulator enclosure combines the impact screen with side and upper protection designed to contain shots around the target area. A deeper enclosure generally covers a greater portion of the ball’s possible path than a shallow one.
Side barriers should extend far enough into the room to intercept realistic off-center shots from the planned hitting position. The upper portion should be deep enough to contain high-launch shots before they reach the finished ceiling.
The enclosure’s exterior dimensions must fit the room while leaving enough open space for the golfer’s swing. Choosing the deepest enclosure available won’t help if its frame or side protection interferes with the club.
Compare Foam Padding and Felt Wall Covering
Foam wall panels can absorb some of the energy from an errant golf ball while protecting drywall, masonry, and other hard surfaces. They’re especially useful near the screen and along walls facing the hitting area.
Felt wall covering can provide a clean, finished appearance and may help prevent marks or soften some glancing contact. Because felt is much thinner than padded protection, it should not automatically be treated as a substitute for impact-rated wall panels in areas likely to receive direct, high-speed shots.
The appropriate material depends on the expected impact. Use substantial protection where direct strikes are realistic and lighter coverings where the primary goals are appearance, light control, or protection from lower-energy contact.
Do Not Overlook the Ceiling
Wedges and other high-launch shots can reach the ceiling before they reach the impact screen, particularly when the golfer stands farther from the screen. Topped shots can also rebound upward after striking the floor or the lower portion of the enclosure.
Ceiling protection should extend from the screen toward the hitting area far enough to cover realistic shot paths. Low beams, soffits, pipes, lights, and projector equipment may require additional attention.
Any overhead padding or panel system must be securely supported and installed for its intended use. Lightweight acoustic tiles or loosely attached material may not withstand repeated ball impacts and could fall into the hitting area.
Protect Gaps, Corners, and the Bottom of the Screen
Small uncovered areas can create some of the most unpredictable rebounds in a simulator room. Exposed frame sections, wall corners, gaps beside the screen, and hard surfaces near the floor can redirect a ball toward the golfer.
Inspect the transition between the impact screen and the surrounding enclosure. Protective material should prevent a ball from passing through an open seam or striking hard framing that faces the hitting position.
The bottom of the screen also deserves attention. Low shots and topped balls may strike the floor, screen fasteners, or a rigid structural piece before losing speed. Use components designed for that location and follow the enclosure manufacturer’s installation instructions.
Protection and Sound Control Are Not the Same
Soft wall and ceiling finishes can reduce echo and make a simulator room sound more comfortable, but acoustic treatment is not always designed to withstand a direct golf-ball strike.
Thin acoustic foam, decorative felt, and carpet tiles may help control sound, light, or appearance while providing limited impact protection. Don’t assume performance just because the material feels soft.
In areas that could receive high-speed shots, choose products specifically intended for impact protection. You can then add acoustic treatment elsewhere in the room to improve sound without being expected to serve as a safety barrier.
Protect Windows, Doors, and Equipment
Windows, glass doors, televisions, shelving, and exposed electronics should remain outside realistic ball and rebound paths. If they cannot be relocated, they may require purpose-designed barriers or protective covers.
The projector and launch monitor also need protection without interfering with their operation. A protective housing must preserve ventilation, sight lines, sensor coverage, and the projected image.
Keep computers, controls, and seating behind or safely beside the golfer. No one should sit or stand in an area that could realistically be reached by a direct shot or rebound.
Install Protection Securely
Wall and ceiling protection must remain secure after repeated impacts. Attachment methods should be appropriate for the panel weight, wall or ceiling construction, and the forces the material may experience.
Do not rely on adhesives alone unless the product and installation instructions specifically allow them for that surface and application. Heat, humidity, dust, and repeated vibration can weaken some adhesive connections over time.
Overhead components require particular care because a failed attachment can drop material or hardware into the swing area. Follow the manufacturer’s instructions and use qualified installation help when the supporting structure or proper mounting method is uncertain.
Test the Completed Protection System
After installation, inspect the room from the hitting position and look for exposed hard surfaces, seams, fasteners, or frame sections facing the golfer. Confirm that curtains, side barriers, and ceiling panels remain properly positioned.
Start with slower, controlled shots and observe how the screen and surrounding materials respond. Pay attention to the speed and direction of rebounds rather than assuming that a soft-looking surface will stop the ball safely.
Stop using the simulator if a ball rebounds with excessive speed, passes through a gap, or causes protective material to move or loosen. Correct the installation before progressing to full-speed shots.
The Bottom Line
Protecting a golf simulator room requires more than placing an impact screen in front of a wall. The enclosure, side barriers, wall padding, ceiling protection, and treatment around gaps and framing must work together to contain realistic misses.
Use heavier impact protection where direct shots are possible, and reserve felt or acoustic treatments for locations suited to their capabilities. The hitting position and room layout should determine how far every protective surface extends.
A carefully planned system will protect the room and equipment while reducing unpredictable rebounds. Inspect and test the completed installation before regular use, and continue checking it for wear or loose components over time.