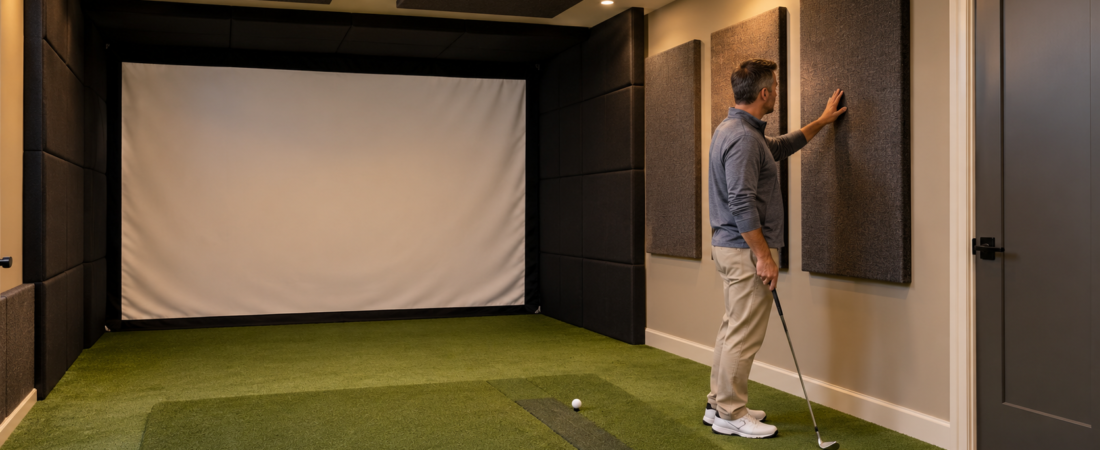
A home golf simulator can be noisier than many homeowners expect. The sound of the club striking the ball is followed almost immediately by the ball hitting the impact screen. Balls dropping onto a hard floor, striking an enclosure frame, or bouncing into a wall can add even more noise.
The room itself can make these sounds seem louder. Concrete floors, drywall, unfinished ceilings, and other hard surfaces reflect sound rather than absorbing it. Fortunately, several parts of the simulator can be adjusted or improved to make the room noticeably quieter.
Identify Where the Noise Comes From
Before adding padding or changing the room, listen for the primary source of the noise. Different sounds require different solutions.
The sharp crack at impact comes from the club and ball. A second sound occurs when the ball reaches the screen. Additional noise may come from the ball dropping onto the floor, contacting the lower frame, or rolling back across a hard surface.
The room may also echo, making every strike seem louder and last longer. Sound can then pass through doors, walls, floors, and ceilings into neighboring rooms.
Have another person listen from inside and outside the simulator room while several controlled shots are taken. This can help determine whether the main concern is the screen impact, floor contact, room echo, or sound traveling through the structure.
Choose an Appropriate Impact Screen
Impact-screen construction can affect the amount and character of the sound produced when the ball strikes it. Thicker, multilayer screens often absorb more energy and may produce less sharp impact noise than thinner entry-level material.
A premium screen isn’t automatically silent, and performance varies by product. When comparing screens, consider noise reduction, durability, image quality, and bounce-back.
A golf net may produce a softer impact sound than some screens because it lacks a tightly woven projection surface. However, a net does not provide the same projected-image experience. The right choice depends on whether you prioritize reducing noise or creating a fully immersive simulator.
Adjust Screen Tension Carefully
An impact screen must remain flat enough to display a good image, but it should not be stretched so tightly that it behaves like a rigid surface. Excessive tension can increase bounce-back and may create a sharper impact sound.
The screen needs enough movement to absorb the ball’s energy. Follow the manufacturer’s installation instructions and use the recommended attachment method rather than pulling every connection as tightly as possible.
If the screen is unusually loud or produces excessive rebound, check the screen’s tension before assuming the material needs replacing. Small adjustments may improve both sound and safety. Do not loosen the screen so much that it becomes wrinkled, unstable, or unable to stop the ball properly.
Leave Enough Space Behind the Screen
The impact screen should not contact the wall behind it when struck. Contact with a hard surface can create additional noise, damage the screen or wall, and cause the ball to rebound more forcefully.
Many installations leave approximately 12 to 16 inches between the screen and the rear wall, although the correct distance depends on the screen and installation method. Follow the specific manufacturer’s requirements.
Check the entire screen, not only its center. A ball striking near an edge may cause the fabric to contact a wall, frame, cable, or other component that is not obvious during a visual inspection.
Soften the Ball’s Landing Area
After striking the screen, the ball usually drops near the front of the enclosure. A hard concrete, wood, or tile floor can create a loud secondary impact and send the ball bouncing unpredictably.
Artificial turf, foam tiles, carpet padding, or another suitable cushioned layer can soften the landing. These materials may also reduce rolling noise and make the simulator feel more finished.
The hitting mat and surrounding floor should form a stable, level surface. Avoid creating raised edges that could become tripping hazards or interfere with the ball return. Any material placed near the screen must remain securely positioned during use.
Protect the Lower Frame
Balls often contact the bottom of the enclosure or exposed frame after dropping from the screen. Even a relatively slow-moving ball can create a noticeable metallic or hollow sound when it strikes an uncovered structural component.
Foam bumpers, padded frame covers, or other products designed for simulator use can soften this contact. They can also reduce unpredictable rebounds and protect the ball and enclosure.
Do not attach improvised material that could interfere with the screen, create a fire hazard, or come loose during use. Components near the hitting area should be intended for repeated impact and installed securely.
Add Wall and Ceiling Padding
Foam wall panels, padded tiles, and other impact-resistant coverings can serve two purposes. They help protect the room from mishits while also absorbing some of the sound that would otherwise reflect off hard surfaces.
The areas nearest the screen and hitting zone usually deserve attention first. Protect side walls, ceiling sections, columns, and other surfaces that may be struck based on the room layout and the golfers’ skill level.
Covering every surface may not be necessary. Begin with the locations most likely to receive a ball strike and the broad, hard surfaces producing the most obvious reflections.
Choose products suitable for the intended location. Securely attach wall padding and install overhead materials so they can’t fall into the hitting area. Consider applicable fire and building requirements before covering large portions of a room.
Reduce Echo With Sound-Absorbing Materials
Soft, porous materials can reduce sound reflections inside the simulator room. Acoustic panels, padded wall coverings, carpet, upholstered furniture, curtains, and similar materials may make the room sound less hollow.
Reducing echo is sometimes described as soundproofing, but the two are not the same. Sound absorption makes the simulator quieter inside the room by limiting reflections. Soundproofing attempts to stop sound from traveling into other rooms and usually requires more substantial construction.
A few strategically placed absorptive surfaces may noticeably improve a garage or basement with concrete and drywall. Their effect on neighboring rooms may be limited if sound still passes through the walls, ceiling, or doorway.
Limit Sound Through Doors and Gaps
Sound can escape through surprisingly small openings. Gaps around a door, an open stairwell, HVAC openings, and unfinished wall penetrations can allow simulator noise to reach other parts of the house.
A solid door generally blocks more sound than a lightweight hollow-core door. Add weatherstripping and a door sweep to reduce gaps, but don’t block heating, cooling, ventilation, electrical, or emergency-access features just to keep noise out.
Control Sound Traveling Through Walls and Ceilings
Reducing sound transmission into an adjoining bedroom or living area is more difficult than reducing echo within the simulator. Club strikes and ball impacts can create both airborne sound and vibration that travel through the building.
More effective sound isolation may involve insulation within wall or ceiling cavities, additional layers of dense building material, resilient channels, isolated framing, or specialized doors. These improvements are easier to include during construction than after the room is finished.
A basement simulator may transmit sound through the ceiling into the room above. A garage may share a wall with a bedroom or living area. The simulator’s location can therefore matter as much as the treatment added afterward.
Major soundproofing work should be designed and installed appropriately. Poorly planned alterations can create moisture, ventilation, electrical, or fire-safety problems without delivering the expected noise reduction.
Reduce Vibration From Equipment
A projector, computer, speaker, fan, or enclosure component may vibrate, which becomes more noticeable when attached to a wall or ceiling. Loose hardware can also rattle when the ball strikes the screen.
Periodically check the enclosure connections, projector mount, ceiling hardware, and nearby fixtures. Tighten components and replace damaged fasteners or padding.
Suitable vibration-isolating material may reduce equipment noise, but it must not compromise the strength of a projector mount or other overhead installation. Structural safety is more important than eliminating a minor hum or rattle.
Manage Projector and Computer Noise
The projector and computer add steady background noise through their cooling fans. This is usually much quieter than a golf shot, but it can become noticeable between swings.
Keep air intakes and exhaust openings clear so the equipment doesn’t run hotter than necessary, as dust buildup and restricted ventilation can make fans operate faster and louder.
Do not enclose a projector or computer in unventilated padding. Any protective housing must provide the airflow required by the manufacturer.
Use Volume Carefully
Simulator software, televisions, and speakers can add to the overall noise level. Rather than just cranking the volume up on the television in the other room to compete with the sound of golf shots, place speakers closer to the enclosure and use a moderate volume rather than trying to fill the entire room. Headphones may be useful for some individual practice sessions, provided the golfer can still remain aware of other people and activity around the hitting area.
If several people use the simulator, agree on reasonable playing hours and volume levels. Simple scheduling may prevent more disturbance than an expensive room modification.
Make Improvements in the Right Order
Begin with the simulator itself before considering major construction. Confirm the screen has appropriate tension and rear clearance. Add cushioning where the ball lands and protect any frame components that are being struck.
Next, address obvious room reflections with suitable flooring, padding, or acoustic treatment. Listen again from nearby rooms to determine whether the changes reduced the actual problem.
If too much sound still travels through the structure, evaluate doors, gaps, shared walls, and ceilings. This step-by-step approach makes it easier to identify the most beneficial improvements.
Build a Quieter Complete Setup
A golf simulator will never be silent. The club striking a real golf ball produces a sharp sound, and the screen must absorb a high-speed impact. The realistic goal is to reduce unnecessary noise and keep it from becoming disruptive.
Start with a properly installed impact screen, adequate space behind it, and a cushioned landing area. Protect exposed frame components, add wall or ceiling padding where needed, and use sound-absorbing materials to control echo.
If the simulator shares a wall or ceiling with a quiet living space, consider sound transmission during planning. Choosing the right room and addressing the primary noise sources early can produce a simulator that is more comfortable to use and less noticeable throughout the rest of the home.