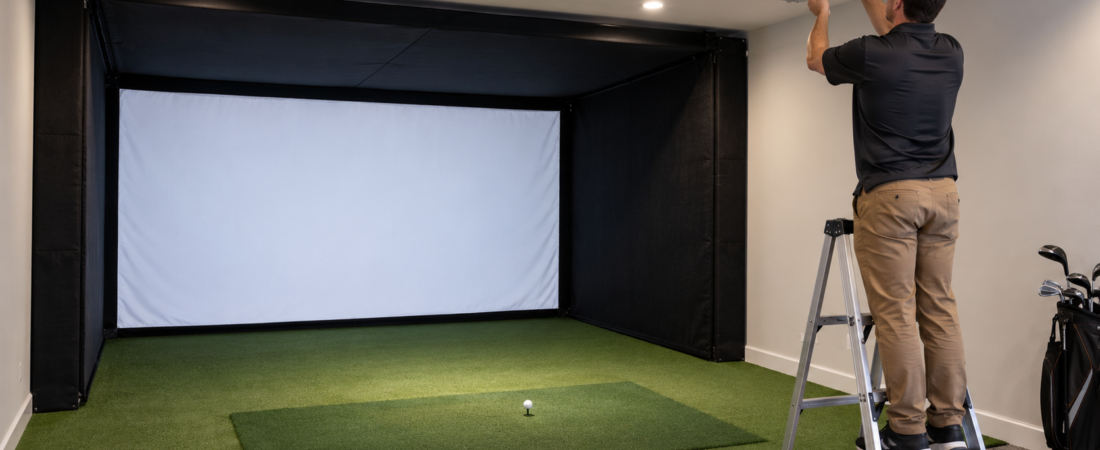
Projector placement can determine whether a home golf simulator delivers a clean, properly sized image or becomes a frustrating collection of shadows, alignment problems, and exposed equipment. The projector must fill the impact screen while remaining outside the golfer’s swing path and protected from direct shots and rebounds.
No single mounting distance works for every simulator. The correct location depends on the projector’s throw ratio, the projected image width, the screen’s aspect ratio, the golfer’s hitting position, and the room’s dimensions. Planning these pieces together before drilling into the ceiling can prevent expensive mistakes.
Start With the Screen and Room
Projector placement begins with the size and shape of the impact screen. The projector must be able to produce an image that fits the screen from a location available in the room.
Measure the usable screen width and height rather than relying only on the enclosure’s outside dimensions. The frame, border, and attachment area may reduce the portion of the screen available for the projected image.
Next, record the room’s ceiling height and total depth, along with the planned distance between the ball and screen. Mark the golfer’s stance and swing area so the projector is not placed where the club could contact it.
Understand Throw Ratio
Throw ratio describes the relationship between the projector’s distance from the screen and the width of the image it produces. It is one of the most important specifications to check before buying or mounting a projector.
The basic calculation is:
Throw distance = Image width × Throw ratio
For example, a projector with a throw ratio of 0.8 would need to be approximately 9.6 feet from the screen to project a 12-foot-wide image. A projector with an adjustable throw-ratio range offers more flexibility than one with a fixed lens.
Use the manufacturer’s throw-distance calculator whenever one is available. The calculator can show whether a particular projector will produce the required image size from the proposed mounting location.
Why Short-Throw Projectors Are Common
Short-throw projectors can produce a large image from a relatively short distance. This makes them useful in home simulator rooms, where a standard projector might need to sit too far behind the golfer or create large shadows.
The term short throw doesn’t describe a single mounting distance. Different models have different throw ratios, zoom ranges, offsets, and installation requirements. A projector described as short-throw is not automatically suitable for every screen and room.
Choose the projector based on the required image width and the available mounting locations. The goal is to fill the screen without placing the projector in the swing path or in an area likely to be struck by a ball.
Ceiling Mounting
Ceiling mounting is common because it keeps the projector off the floor and away from normal foot traffic. When positioned properly, it can also reduce shadows and lower the risk of a direct ball strike.
The projector is often mounted above or slightly behind the hitting area. The exact position depends on its throw ratio and the distance between the ball and the screen. It should be high enough and far enough behind the golfer that the club cannot reach it during the backswing or follow-through.
Do not rely on appearance alone when judging swing clearance. Mark the proposed location, then have every regular user take slow practice swings with a driver. A projector that feels uncomfortably close may make the golfer alter their swing even if the club technically clears it.
Use mounting hardware designed for the projector’s weight and installation surface. Secure the mount to suitable framing or another structurally appropriate support rather than attaching it only to finished ceiling material.
Account for Ceiling Height
A projector and its mount reduce the room’s usable height. This matters when the ceiling is already close to the minimum height needed for a full swing.
Low-profile ceiling mounts preserve more clearance, but the projector still needs adequate ventilation. A drop mount may be useful for very high ceilings, but it must remain safely above and outside the swing area.
Measure from the finished hitting surface to the lowest part of the mounted projector or bracket. Also account for overhead launch monitors, lights, garage-door hardware, and enclosure components when evaluating clearance.
Avoid Shadows on the Screen
A shadow appears when the golfer or club interrupts the light traveling from the projector to the impact screen. The likelihood of shadows depends on the projector’s height, mounting distance, lens characteristics, and the golfer’s position.
Placing a ceiling-mounted projector above or slightly behind the hitting area often helps keep the light path over the golfer. Moving the projector too far behind the player may cause the body or club to block part of the image.
Before permanently installing the mount, temporarily position the projector and display a full-screen test image. Stand in the hitting position and make controlled practice swings while another person watches the screen for shadows.
Floor-Mounted Projectors
A floor-mounted projector may be an option when ceiling mounting is impractical. It is generally positioned between the golfer and the impact screen, where a short-throw lens can produce the required image.
This location exposes the projector to direct shots, low mishits, ricochets, dropped clubs, and foot traffic. A protective projector enclosure designed for simulator use is therefore important.
The protective enclosure must not block the lens or ventilation openings. It should also be positioned so it does not create a tripping hazard or interfere with balls returning from the screen.
A projector placed on the floor behind the golfer is likely to cast a large shadow. For that reason, floor installations typically require a projector that can produce the full image from a position closer to the screen.
Frame and Other Mounting Options
Some projectors can be attached to a properly designed simulator-enclosure frame. This may be useful when drilling into the ceiling is undesirable or when the ceiling is unusually high.
The enclosure must support the projector and mount. Adding equipment to a frame that was not designed for it may affect stability or create an unsafe installation.
A cart, shelf, or table can provide temporary flexibility, but it is easier to bump or move out of alignment. These options may also take up valuable space and create additional shadow or cable issues.
Whatever mounting method is chosen, the projector should remain stable, well-ventilated, and protected while projecting an image that stays aligned with the screen.
Consider Projector Offset
Projector offset describes where the image appears vertically in relation to the center of the lens. Two projectors with similar throw ratios may require different mounting heights because their offsets are different.
A suitable offset allows a ceiling-mounted projector to fill the screen while staying close to the ceiling. An unsuitable offset may require tilting or lowering the unit, potentially reducing swing clearance.
Lens shift provides optical adjustment that can move the image without physically tilting the projector. Keystone correction digitally reshapes an angled image, but relying heavily on it may reduce usable resolution or image sharpness.
Whenever possible, choose a projector and mounting position that aligns naturally with the screen. Use lens shift or modest digital correction for fine adjustments, not as a substitute for proper placement.
Match the Image to the Screen
The projected image and impact screen should use compatible aspect ratios. Common formats include 16:9, 16:10, and 4:3. If the shapes do not match, the image may leave unused screen space or extend beyond the viewing area.
The computer and simulator software must also be set to an appropriate resolution. A projector cannot fill an unusually shaped screen perfectly if the source device is sending an incompatible image.
Plan the screen dimensions, aspect ratio, projector resolution, and throw distance before purchasing the projector. These specifications work together and should not be treated as separate decisions.
Coordinate With the Launch Monitor
The projector must not interfere with the launch monitor’s cameras, radar, hitting zone, or mounting position. This is especially important when both devices are attached to the ceiling.
Overhead launch monitors usually require a specific location and height in relation to the ball. Confirm that the projector mount, power cable, and image path will remain outside the launch monitor’s required area.
Floor-standing launch monitors also need an unobstructed view of the hitting area or ball flight. A floor-mounted projector enclosure should not block that view or occupy the same required space.
Plan the launch monitor first, when its installation specifications are less flexible. Then select the projector model to work from one of the remaining safe locations.
Plan Power and Cable Routes
A ceiling-mounted projector requires power and a connection to the computer or other image source. Depending on the system, that connection may use HDMI, another video cable, or a suitable wireless arrangement.
Long cable runs may require higher-quality cables or signal-extension equipment. Plan the route before installation so wires do not hang into the swing area or cross the floor.
Do not use an extension cord as a permanent substitute for properly located electrical service. If a new ceiling outlet or concealed wiring is needed, consult a qualified electrician.
Test Before Drilling
A throw-distance calculation provides a starting point, but a physical test can reveal issues that are difficult to anticipate on paper. Temporarily place or hold the projector at the proposed location and display an image on the screen.
Check whether the image fills the intended area, remains in focus, and can be aligned without excessive digital correction. Stand in the hitting position and look for shadows. Make controlled practice swings to verify that the projector and mount will remain well outside the club’s path.
Also check the projector’s relationship to lights, ceiling beams, enclosure parts, launch monitors, garage-door tracks, and ventilation. Do not drill permanent mounting holes until the complete arrangement has been tested.
Plan the Projector as Part of the System
The best projector location isn’t simply where the image appears on the screen. It must also protect the equipment, preserve swing clearance, limit shadows, and work with the room, enclosure, and launch monitor.
Start with accurate screen dimensions and use the projector’s throw ratio to identify possible mounting distances. Test the preferred location before installing permanent hardware, and confirm that the finished arrangement works for every regular user.
A carefully planned projector installation produces a cleaner image and a safer, more comfortable simulator. More importantly, it prevents the common mistake of buying a projector first and then trying to force it into a room where it does not fit.