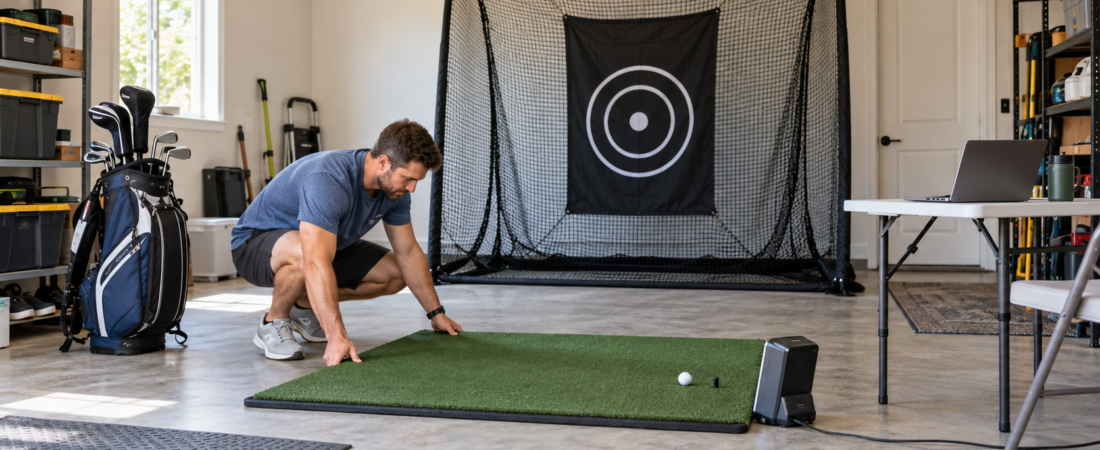
Building a home golf simulator doesn’t require buying a premium package all at once. A practical setup can begin with a launch monitor, a safe hitting area, a quality mat, and a net, then expand as the budget allows.
The key is deciding which parts directly affect safety and performance and which features can wait. Spending carefully does not mean choosing the cheapest version of everything. It means investing in the components that matter most, avoiding incompatible purchases, and creating an upgrade path that doesn’t require starting over.
Decide What You Want the Simulator to Do
Begin by identifying the main purpose of the simulator. A golfer primarily interested in practicing distances and reviewing shot data may not need an impact screen and projector right away. A launch monitor, hitting mat, net, and compatible phone or tablet may provide everything you need to get started.
Someone who wants to play virtual courses on a large projected image will need a more complete system. That usually includes simulator software, a suitable computer, an impact screen, an enclosure or surrounding protection, and a projector.
Write down the features that are necessary now and those that would simply be nice to have. This prevents optional items from consuming the budget before you select your essential equipment.
Measure Before Setting the Budget
The room can determine which equipment will work and how much the installation will cost. A launch monitor that appears affordable may require more depth than the room provides. A standard enclosure may not fit around a beam, garage-door track, or low ceiling.
Measure the usable ceiling height, width, and depth. Include the lowest overhead obstruction, the space behind the screen, the distance between the ball and the screen, and the room behind the golfer.
Using actual measurements prevents spending money on equipment that cannot be installed properly. It may also reveal that a simpler system fits the space better than a full enclosure and projector setup.
Choose a Room That Needs Less Work
Using an existing garage, basement, or spare room can save considerably compared with constructing a dedicated simulator space. However, the least expensive room is not always the first empty room available.
Consider ceiling height, electrical service, lighting, temperature control, moisture, and surrounding surfaces. A low basement ceiling or crowded garage may require costly changes before you can use the simulator safely.
A room with suitable dimensions and few obstructions can reduce the need for custom framing, electrical work, relocated fixtures, and specialized equipment. Choosing the right location may save more than finding a discount on an individual component.
Build the Simulator in Stages
A staged approach lets you use the simulator before you buy every component. It also gives the golfer time to learn which upgrades would provide the greatest benefit.
A basic first stage might include:
A launch monitor.
A quality hitting mat.
A properly sized golf net.
A compatible phone, tablet, or existing computer.
The next stage might add an impact screen, an enclosure, and a more capable computer. A projector, finished flooring, wall padding, ball return, seating, and decorative improvements can follow later.
Plan the stages before purchasing the first item. Components selected at the beginning should remain useful as the simulator grows.
Do Not Cut Corners on Safety
Safety should not become the source of budget savings. The ball must be contained reliably; the golfer needs enough room for a full swing; and hard surfaces or exposed frame components must be protected where necessary.
A net or impact screen should be designed to receive real golf balls at the speeds expected in the room. Lightweight practice material intended for foam balls may not be suitable.
Consider less experienced golfers and guests, not only the person building the simulator. Side barriers, overhead protection, wall padding, or a full enclosure may be necessary if a mishit could reach a window, wall, ceiling, person, or valuable equipment.
Prioritize a Good Hitting Mat
An inexpensive mat may seem like an easy way to save money, but repeated strikes into a hard or poorly cushioned surface can be uncomfortable and may place unnecessary stress on the hands, wrists, and elbows.
A suitable hitting mat should stay stable, provide enough cushioning, and let the golfer stand level with the ball. A replaceable hitting strip can reduce long-term costs because you can replace the worn section without replacing the entire mat.
It may be possible to use a smaller hitting strip with separate stance mats or surrounding turf. The finished surface should remain level and secure, without gaps or raised edges that interfere with the stance.
Match the Launch Monitor to the Room
Launch monitors vary widely in price, measured data, software compatibility, and indoor-space requirements. Paying for features you won’t use is unnecessary, but choosing a device based only on price can create problems.
Some lower-cost radar units require considerable space behind the ball and between the ball and the net. Camera-based units positioned beside the ball may work with less depth but have different hitting-area or lighting requirements.
Determine which measurements and software features you genuinely need. Then compare only the models that fit the room. An affordable launch monitor is not a bargain if it cannot operate accurately in the available space.
Use an Existing Device When Practical
Some launch monitors work with a compatible phone or tablet, letting the golfer begin without buying a gaming computer. An existing television or monitor can display shot data and virtual play without requiring a projector.
Check the device and software requirements carefully. A basic app may work well on equipment you already own, while detailed course software may require a Windows computer with a capable graphics card.
Starting with an existing device can delay a large expense. If you’ll eventually need a computer upgrade, choose the latter system based on the software and display resolution you plan to use.
Start With a Net Instead of a Projected Screen
A golf net is often the least expensive way to create a safe hitting area. Shot data and simulated ball flight can be viewed on a phone, tablet, computer monitor, or television positioned away from the ball path.
This arrangement doesn’t provide the immersive experience of hitting a projected course, but it can offer meaningful practice at a much lower upfront cost. It can also be easier to move or store in a multipurpose room.
Choose a net large and strong enough for the intended use. You may still need side netting or additional barriers. If you plan to add a projected screen later, plan the room so the hitting position and launch monitor can remain usable after the upgrade.
Choose the Screen and Enclosure Carefully
When a projected image becomes a priority, compare the cost of a complete enclosure with a screen-only or partially built installation. A complete enclosure can simplify compatibility and provide integrated side and overhead protection. A screen-only approach may cost less but leaves the homeowner responsible for designing the supporting structure and protection.
Standard sizes are often more economical and easier to replace than custom products. If a standard enclosure fits the room safely, it may offer better long-term value.
Custom-sized screens and enclosures can make better use of an unusual room, but measurements must be accurate, and custom products are often difficult or impossible to return. Confirm the size, aspect ratio, and installation method before ordering.
Delay the Projector if Necessary
The simulator can function without a projector when shot information is displayed on another device. Delaying the projector lets more of the initial budget go toward the launch monitor, hitting mat, and safe ball containment.
When it’s time to add the projector, choose one based on screen width, aspect ratio, desired resolution, room lighting, and available mounting locations. Don’t buy an inexpensive projector just because it produces a large image in a demonstration.
A projector with the wrong throw ratio may not fill the screen from a safe location. Replacing a poor match costs more than waiting and purchasing the correct model once.
Use Do-It-Yourself Work Selectively
Some homeowners can reduce installation costs by assembling an enclosure, laying foam tiles or turf, painting the room, routing low-voltage cables, or constructing simple storage.
Leave other work to qualified professionals. Electrical outlets, structural ceiling mounts, major framing changes, garage-door modifications, and alterations affecting building safety require expert knowledge.
A do-it-yourself solution is worthwhile only when it remains safe and durable. Rebuilding a weak frame or repairing damage from an improvised installation can cost you more than the original savings.
Consider Used and Refurbished Equipment
Used projectors, computers, monitors, and launch monitors may reduce the initial cost. Confirm the condition, included accessories, software transfer rules, subscription requirements, and remaining warranty before purchasing.
A used projector may need a replacement lamp or have limited brightness. A launch monitor may be tied to an account or require a transfer fee. An older computer may run basic software but struggle with newer courses or higher resolutions.
Screens, hitting mats, and nets wear out and may look less attractive, so inspect their condition carefully. Damage or weakened material may not be obvious in a listing photograph.
Account for Ongoing Costs
The purchase price is not the only expense. Simulator software, course libraries, launch-monitor memberships, cloud storage, and online play may require recurring payments.
Other continuing costs can include replacement hitting strips, screen wear, projector lamps, electricity, heating or cooling, and occasional computer upgrades.
Consider these expenses before choosing the equipment. A product with a lower initial price but a required annual subscription may cost more over several years than a more expensive alternative with fewer continuing fees.
Avoid Buying the Same Component Twice
The most expensive budget mistake is often buying a temporary item that plays no role in the finished simulator. A small net, underpowered computer, incompatible projector, or poorly sized screen may have to be replaced rather than upgraded.
Temporary equipment can make sense when it remains useful for outdoor practice, travel, or another room. Otherwise, waiting and saving for the correct component may cost less overall.
Create a final equipment plan, even if you’ll make purchases gradually. Knowing the intended screen size, launch monitor, software, projector, and floor layout helps ensure that each early purchase fits the completed system.
Spend According to Your Priorities
Golfers value different parts of the simulator experience. One person may care most about accurate club and ball data. Another may prioritize realistic course graphics, a quiet screen, or a finished room they can share with family and friends.
Put more of the budget toward the feature that matters most after safety and fit are addressed. There is little reason to buy an expensive 4K projector if the simulator will mainly be used for swing practice. Likewise, a golfer interested in detailed club data may regret directing too much money toward decorative finishes.
A balanced simulator doesn’t require every component to be at the same price level. It requires the parts to work together and support the way the room will actually be used.
Create a Practical Upgrade Plan
A budget simulator can begin simply and still develop into a complete indoor golf room. Start with accurate measurements, safe ball containment, a suitable hitting mat, and a launch monitor that fits both the room and your goals.
Use an existing phone, tablet, computer, or television when practical. Add the impact screen, enclosure, projector, wall protection, finished flooring, and accessories as they become worthwhile.
Planning the final system before the first purchase keeps a staged build economical. When every component has a purpose in both the current and future setup, the simulator can improve over time without wasting the money already invested.